TABLE OF CONTENTS
You did it. You finally caved in and bought a liquid cooler—if for nothing else than to shut up that one annoying friend that keeps bugging you to get liquid cooling.
And now that it’s finally here and…
How exactly are you supposed to use it without frying your CPU?
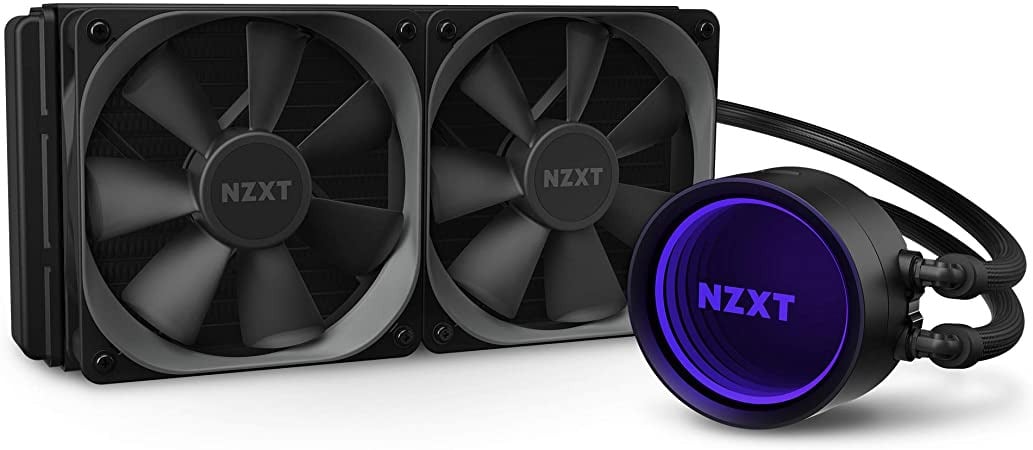
The NZXT Kraken x63 280mm AIO RGB CPU Liquid Cooler – Image-Credit: NZXT
Well, let’s get some short questions out of the way real quick so we’re on the same page before diving into the main topic of this Article: How to connect your AIO properly!
What does AIO stand for?
What is an AIO, anyway?
Well, AIO stands for “All In One,” and in PC cooling describes a liquid Cooler that is ready to be used without the need for custom tubing or liquid setup. It’s plug-and-play and can be installed more easily than custom liquid cooling.
What Is an AIO Pump?
On most AIO liquid coolers, the pump is the part you place right on top of the CPU.
The pump is responsible for moving the liquid through the radiator and tubing.
When it comes to any liquid cooling setup, the pump is the heart of the system. This is especially true for a closed-loop system.
If your pump is on the fritz, your cooling performance will go down significantly, to the point where the boxed air cooler you get with your CPU would do a better job of cooling it.
So you must ensure that your pump is mounted properly, thermal-paste and all, working well and that it’s not making any weird noises.
Where to Connect Your AIO Pump
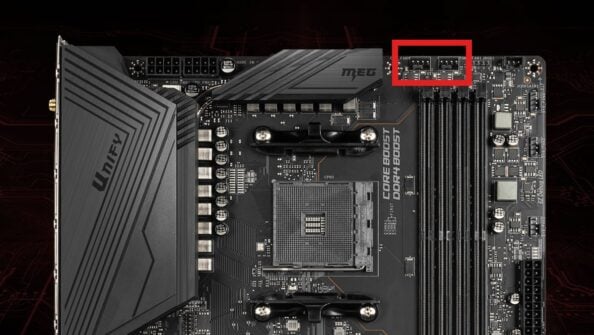
Trying to figure out where to connect your AIO pump can get confusing, as there are so many headers for fans on a motherboard.
But it has gotten quite a bit easier these days.
Here’s which cables are usually attached to an entire AIO:
- 3-Pin Connector
- 4-Pin Splitter Connector(s)
- SATA Connector
- (USB Connector)
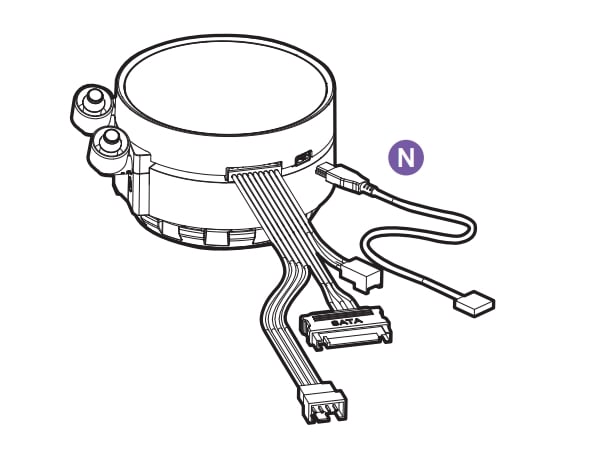
You’ll find these kinds of schematics in your AIO manual – NZXT
So what are all these cables meant for, and where should they be plugged in?
Let’s see:
3-Pin Connector: The 3-Pin Connector should be plugged into your Motherboard’s CPU_FAN Header. It controls the Pump and Fan speeds on your entire AIO. It also ensures the Motherboard does not show a CPU Fan Error when booting.
4-Pin Splitter Connectors: These are meant to be connected and power all your Radiator Fans and ramp them up or down depending on what CPU Temperature is reported by the Motherboard through the CPU_FAN Header.
SATA-Connector: The SATA-Connector should be plugged into a free SATA cable of your choosing and will power the Pump Motor of your AIO and any RGB, LED-Display, or Tach-Features you might have.
USB-Connector: The USB-Connector should be plugged into a free USB 2.0 Header on your Motherboard and is meant to control your AIO and any RGB Features through Fan-Software.
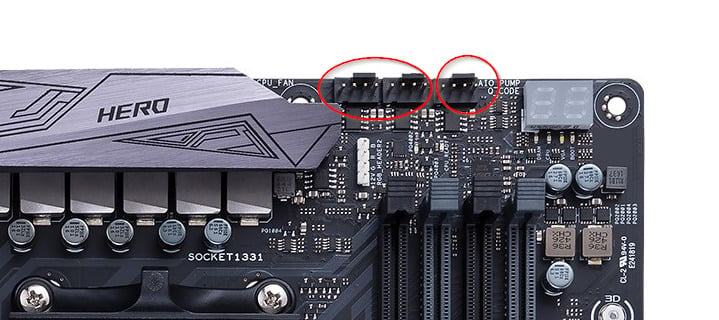
Fan Header placement on Asus’ Maximus Hero Motherboard
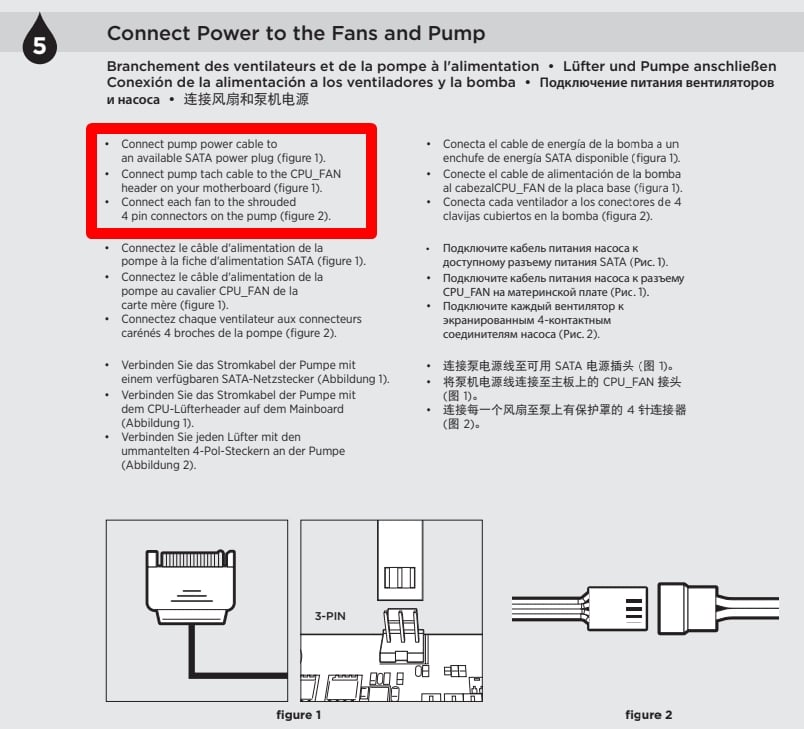
There are a lot of different AIOs on the market. Here’s what Corsair’s H150i Manual says about connecting your AIO:
Here’s the problem:
Because the entire AIO is plugged into the CPU_FAN Header, this also means that both the Pump and Radiator Fans are temperature controlled.
The Pump, though, will be less prone to wear and tear if it runs at a static speed. This is why there is an AIO_PUMP or PUMP_HEADER on many Motherboards. You can plug in your Pump (if it comes with a separate 3-Pin connector) to this Header to control it separately from the radiator’s fans or set it to a fixed 50% to 100% PWM speed.
What if Your Motherboard Doesn’t Have an AIO Pump Fan Header?
Don’t worry; you can still make it work.
If not, here’s a little secret. Those pump-specific headers are all glorified SYS_FAN headers in disguise.
So if your motherboard doesn’t have any AIO_PUMP headers or similar, you can always use SYS_FAN or CHA_FAN as a substitute to plug in your pump if you have a spare one available. It will work the same.
Double-check in your BIOS’s Hardware Monitor, though, that the Header that powers your AIO Pump is set to run at 100% speed.
In Summary
And that was a short article on where you can plug in your shiny new AIO liquid cooler.
If you want a TL;DR on it, the gist of the matter is that you have many options when it comes to where you want to plug in your pump.
You can plug it into an AIO_PUMP header, PUMP_HEADER, W_PUMP, or any other variation of that, and you can even use CPU_FAN or SYS_FAN if you really have to as well.
FAQ
Can you plug an AIO pump into a fan header?
Yes. It will work perfectly fine. You’ll just lose a system fan header.
Can you plug an AIO pump into CPU OPT?
Yes. But it’s really not recommended. CPU_OPT should ideally be saved for the fans that go on your CPU cooler, whether it be liquid or air. That’s because CPU_OPT is a special connection that your motherboard uses to ensure that your CPU is always cool.
It detects whether your CPU is thermal throttling (getting too hot) and increases or decreases the speed of the fans appropriately.
Can a 3-pin fan plug into a 4-pin connector?
Yes. You won’t get the same level of control as with a 4-pin PWM fan, but you can still plug in a 3-pin fan to a 4-pin connector perfectly fine. For more info, check out our PWM vs. DC Fans article.
How can you tell if your liquid cooling Pump is working?
The easiest way to make sure your AIO Pump is working is by touching it with a finger to see if it’s vibrating.
Depending on where you plugged in your Pump you’ll also be able to read your Pump speed in your BIOS or with Monitoring tools such as HWInfo.
Over to you
Hopefully, that explained all your questions about where to plug in your AIO cooler on your motherboard!
Got any other unanswered questions about them? Ask us in the comments or our forum!




7 Comments
23 September, 2023
Hey, I really like your guides, very clean and informative. But I wonder about connecting AIO and radiator fans on Motherboard when AIO is set as top exhaust. Currently I have AIO pump connected to AIO_PUMP and radiator fans connected to fan hub with all fans in the system (1 exhaust back, 2 exhaust top, 3 intake front) and hub connected to chasis header. Should I connect intakes or exhausts or even maybe all fans on HUB to CPU_FAN? (which is currently showing error in BIOS because of lack of connection) I would rather maintain negative/ possitive pressure but Im afraid that Ill need to connect exhaust fans on radiator to CPU_FAN so it will generate negative in current setup as CPU fans will go faster. Anyway cooling is more important so please let me know how to connect it in AIO top exhaust setup.
5 May, 2023
So I saw that you can put a 3pin fan on a 4pin but what about the actual Pump? Or is just the same thing
26 April, 2023
Have a LurkerV360 by Vetroo on a AUSU ROG STRIX B550 F GAMING WIFI 11. The AIO is three pin pump and i think RGB . AND MOUTHERBOARD IS 4PIN THIS is my first build what do i need to do to make this work or adaptors do i need
26 April, 2023
Have a LurkerV360 by Vetroo on a AUSU ROG STRIX B550 F GAMING WIFI 11. The AIO is three pin pump and i think RGB . AND MOUTHERBOARD IS 4PIN THIS is my first build what do i need to do to make this work or adaptors do i need
21 June, 2022
I Have a different aio, the pump only has a 3 or 4 pin not sure but has no other cables, will this work?
22 June, 2022
Hey Sami,
Sure! There are AIOs with only one cable that will power both the pump and the fans together. Should work just fine!
You can also consult the installation manual if you’re hesitant.
Cheers,
Alex
2 December, 2021
This information is not correct. The pump should be installed in de CPU_FAN header. This is in any manual. The pump should ramp up when the CPU gets hot. The fans of the AIO cooler can be hooked up on CPU_OPT or a SYSTEM_FAN header.